
Create and send invoices
Last updated:
Set up your invoices once, then create, send and track them in a few clicks.
Step 1: Set numbering and taxes
Go to Settings → Organization → Invoice (called Account in a personal workspace). Under Invoice Numbering, set a Prefix like INV- and the counter. Under Invoice Taxes, choose the Default Tax Calculation Mode (added on top or already included in the price) and Add Tax Preset for each tax you use.
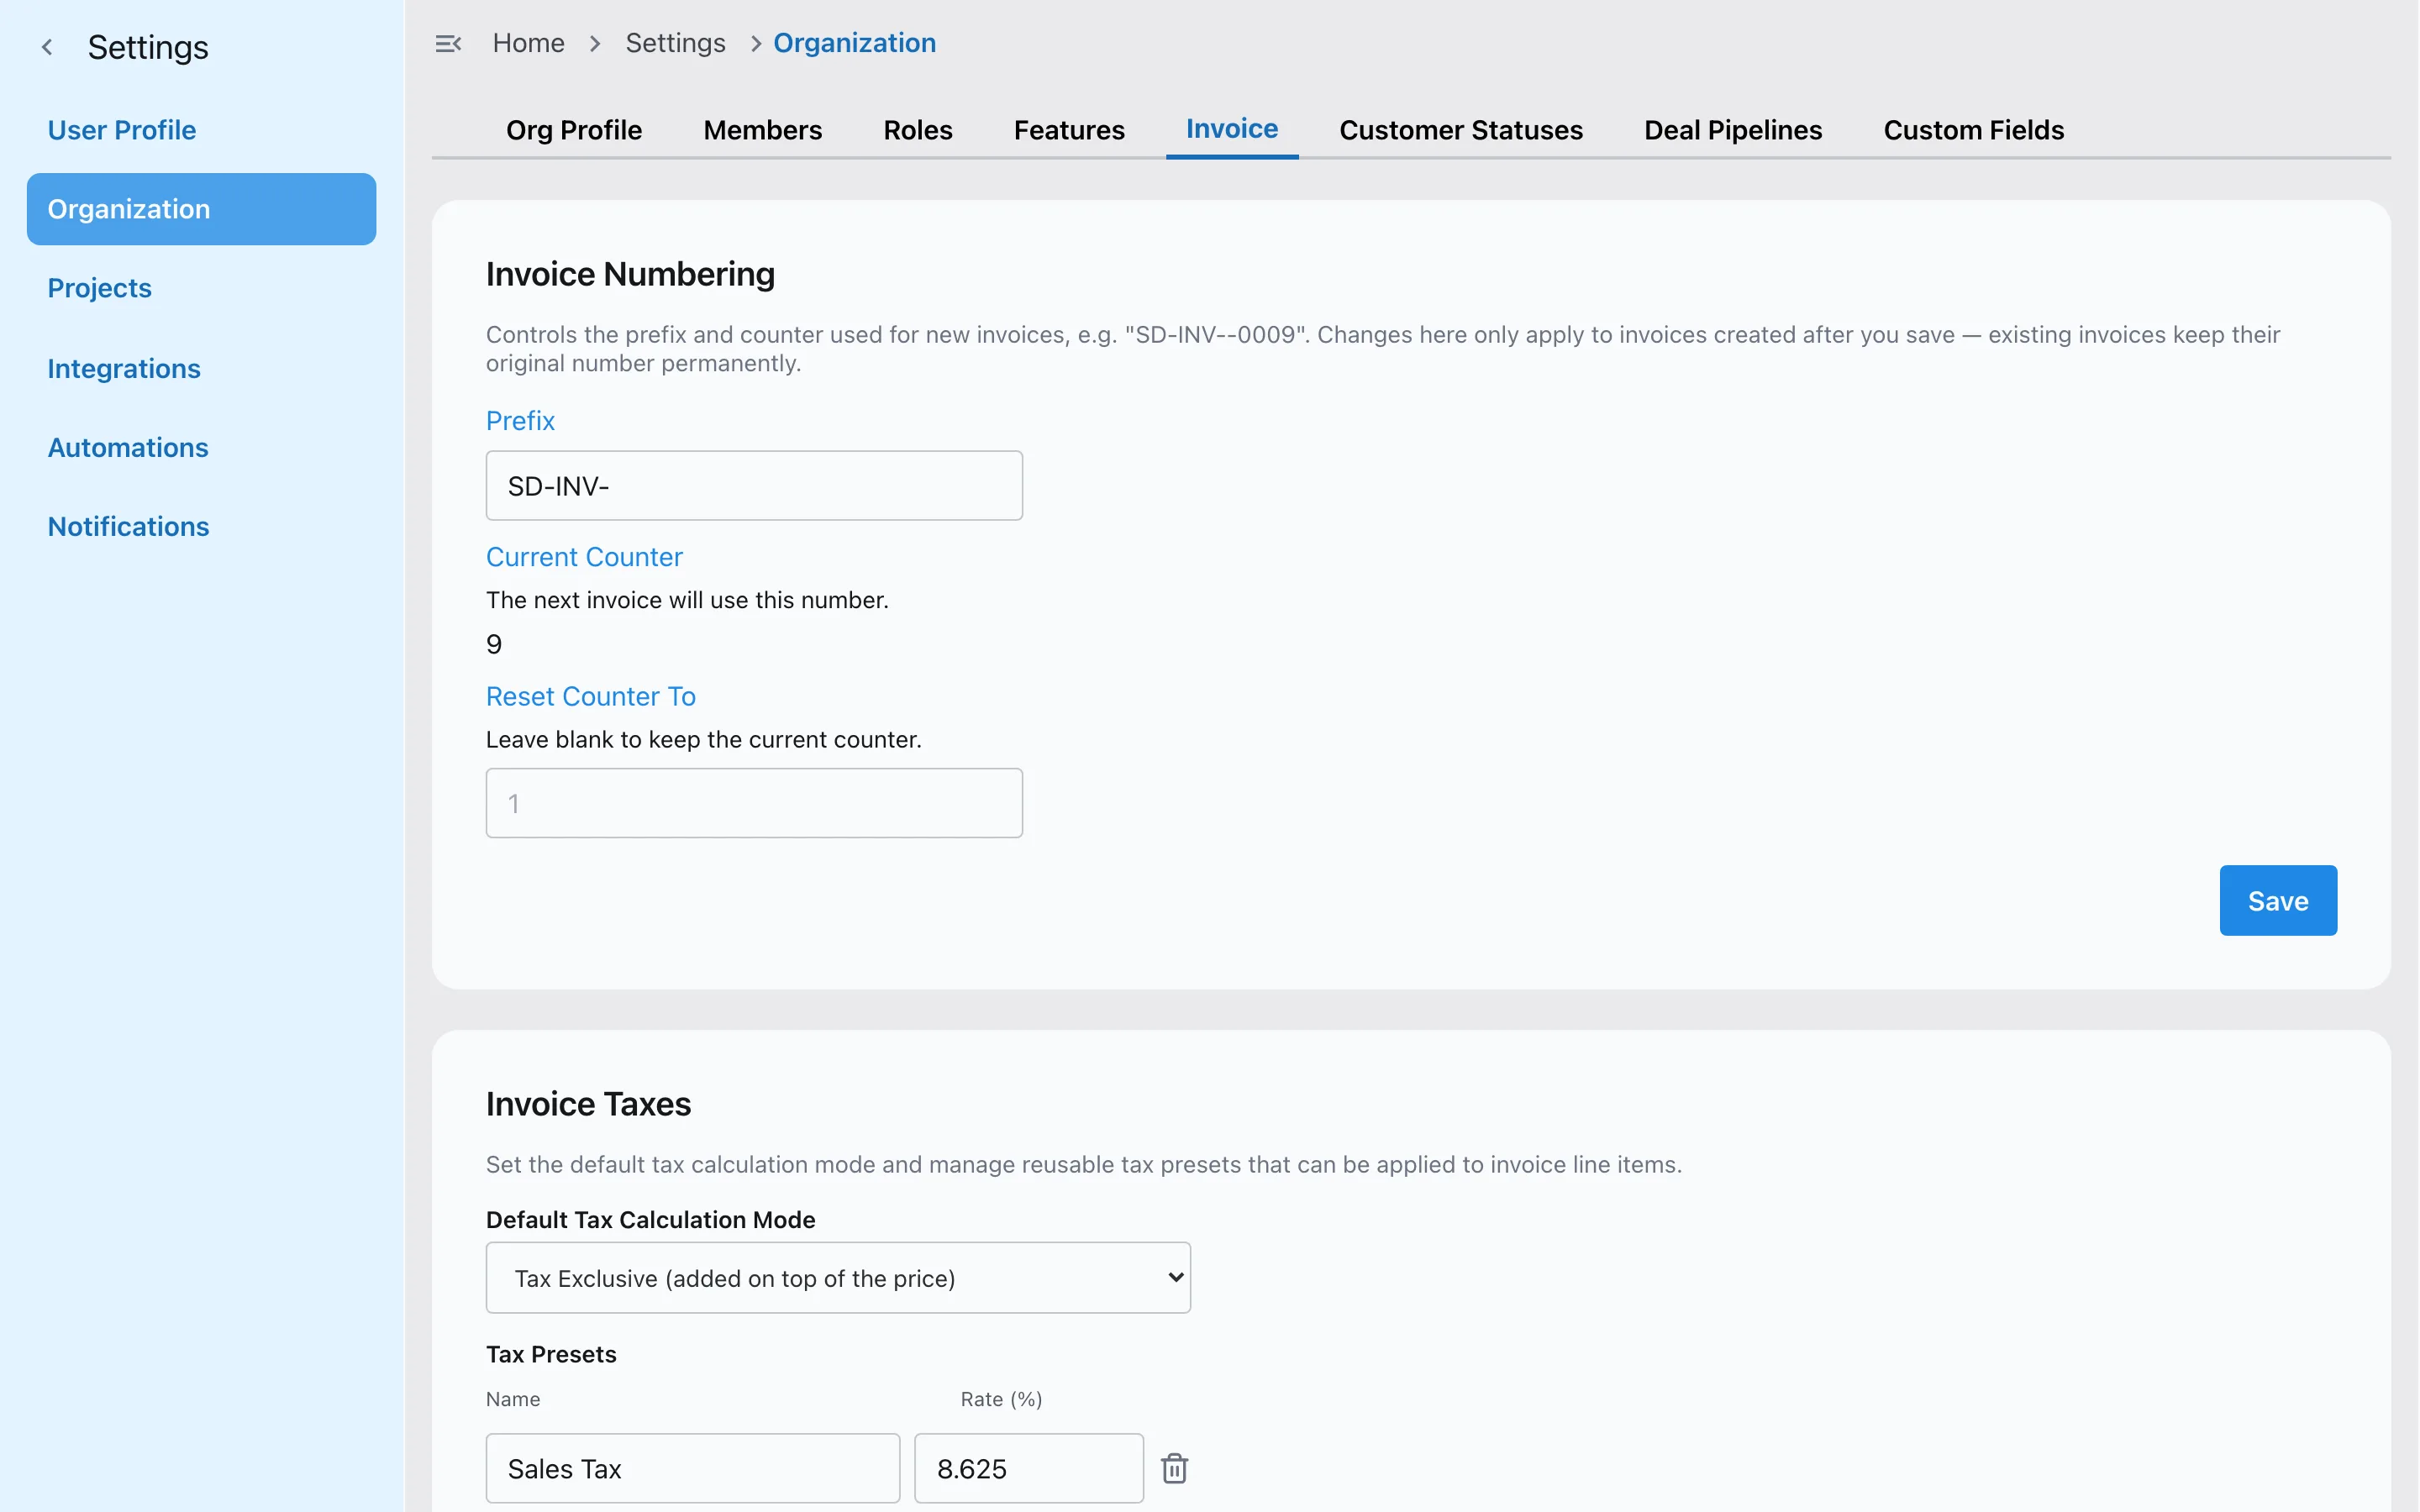
Invoice numbering with your own prefix. Step 2: Add your branding
Open Invoices in the sidebar and choose Invoice Template. Add your Logo, Company Name and Company Address, pick an Accent Color and write the Footer Text. Every invoice PDF uses them.
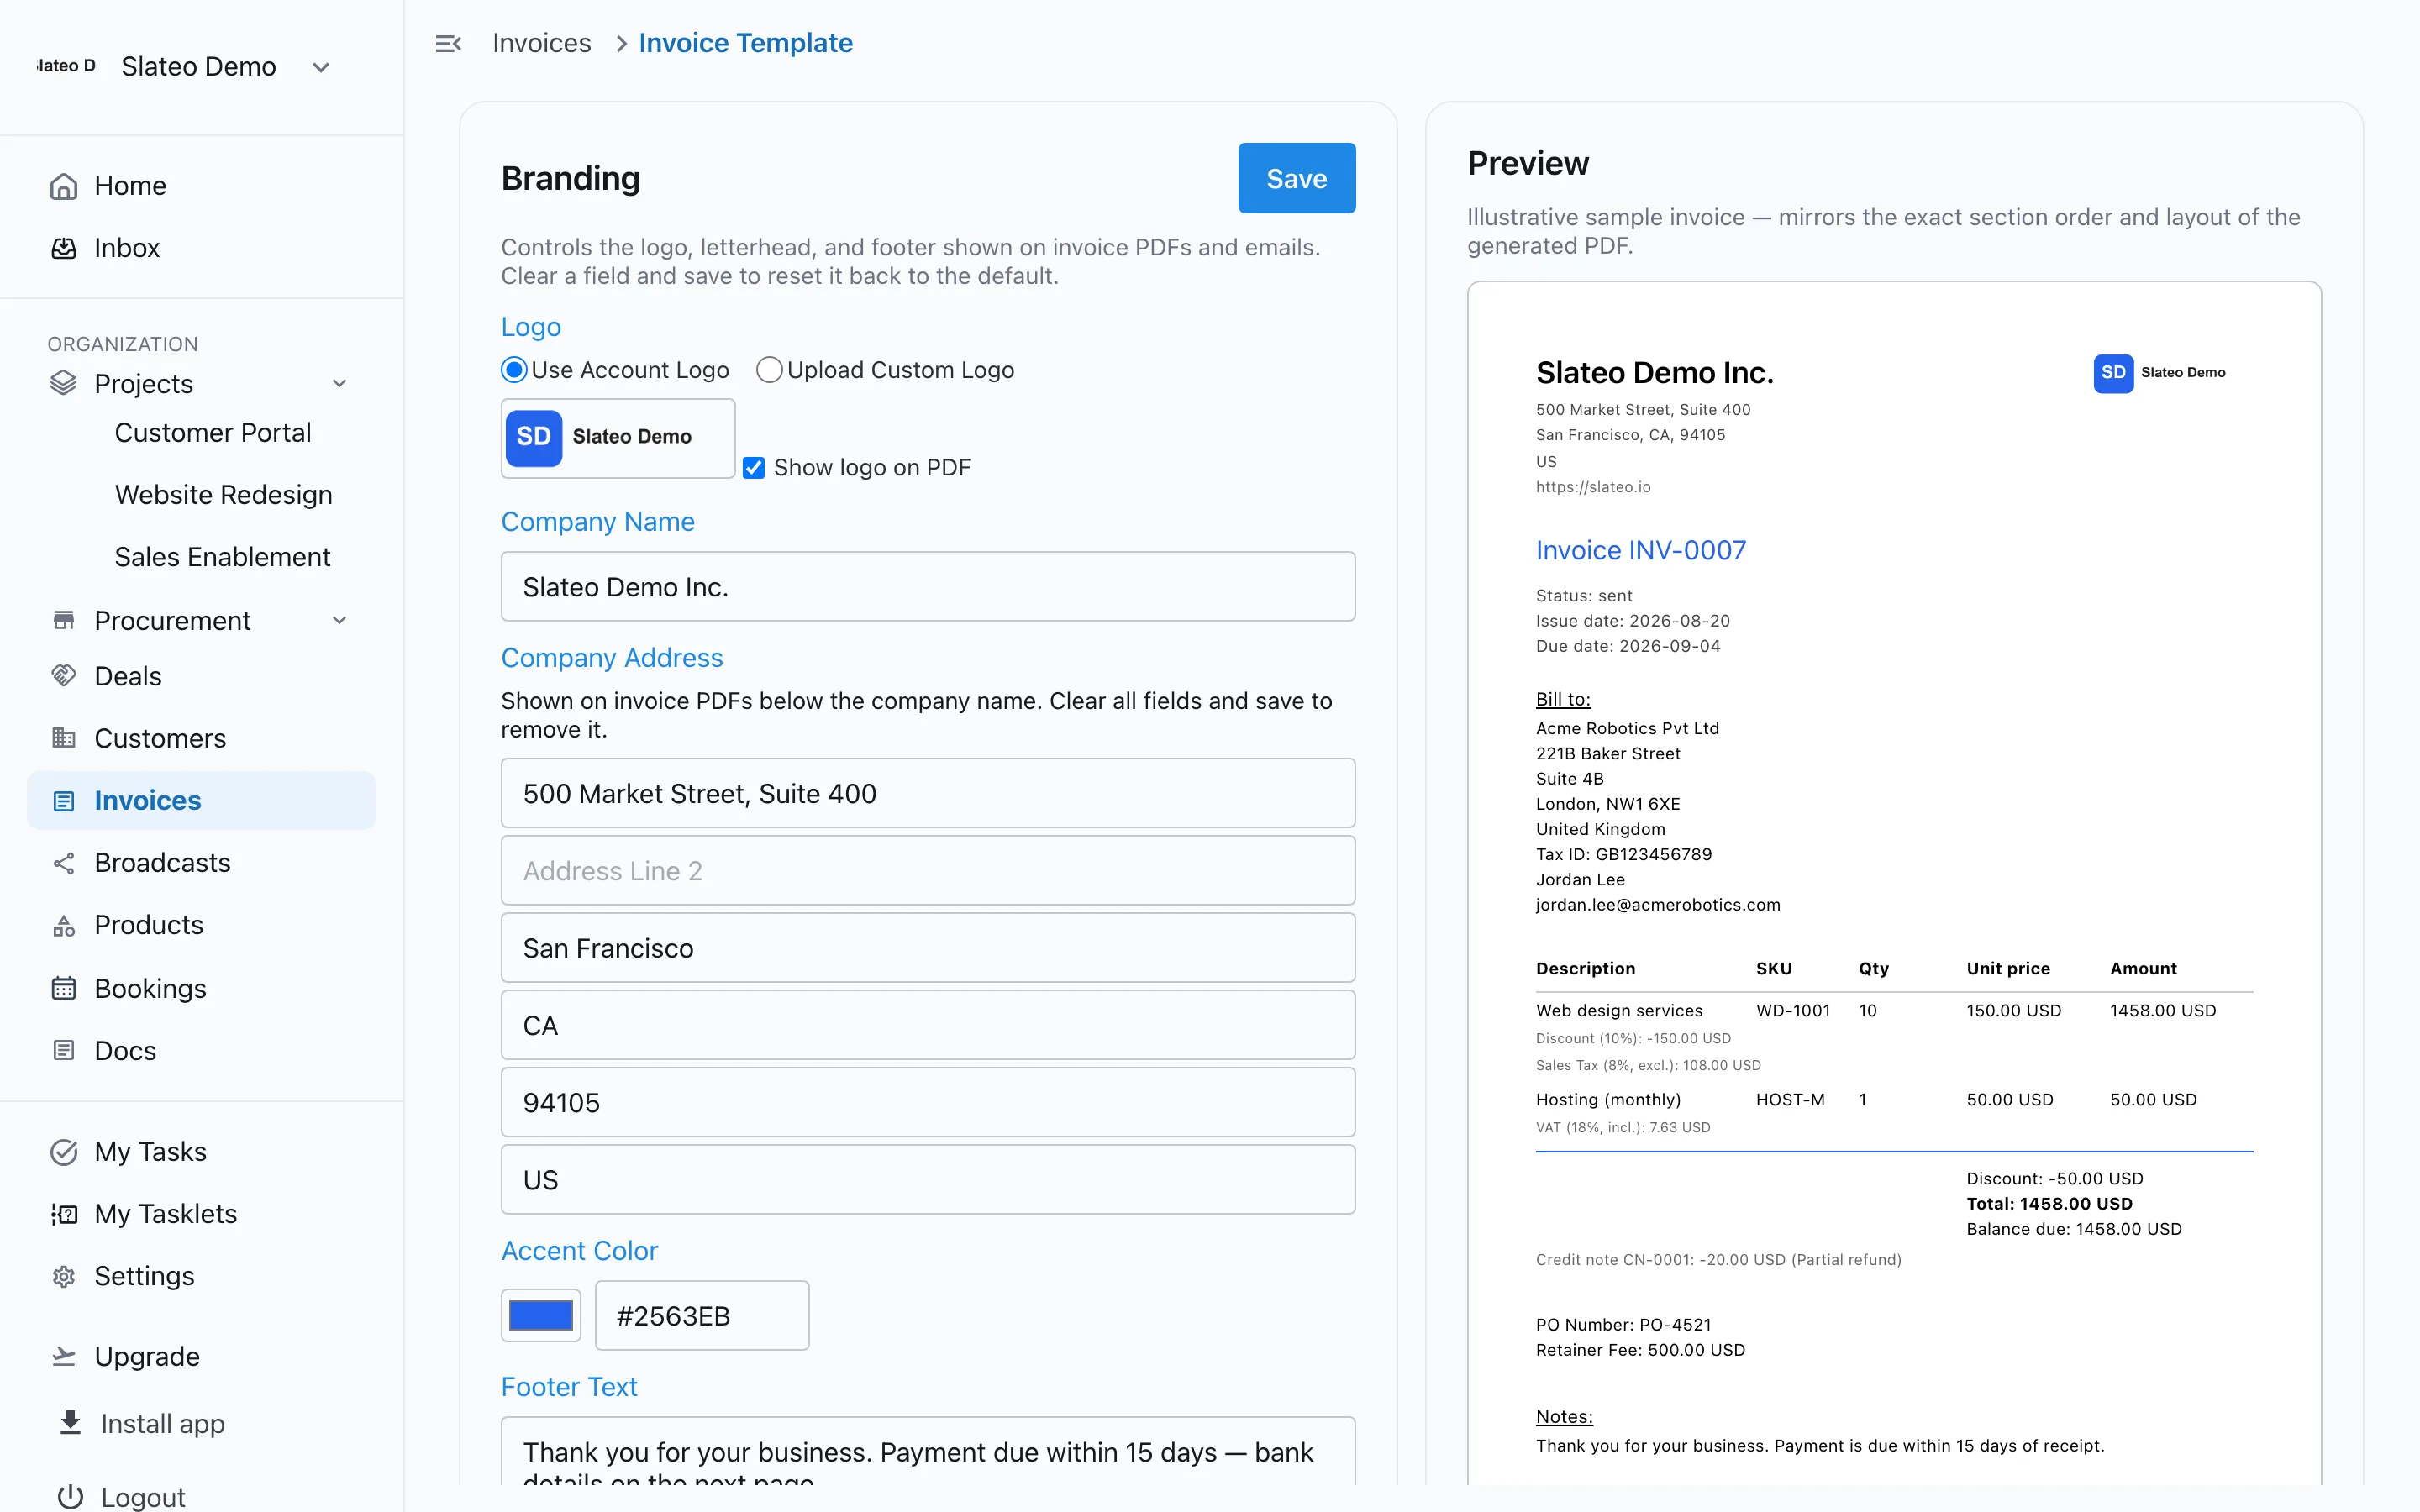
The invoice template with a live preview. Step 3: Create an invoice
Choose New Invoice in Invoices, or start one from a customer or a deal so they're filled in. Add each line with Add Line Item: description, quantity and unit price. Choose Add Tax on a line to apply a tax, and Add Discount for a percentage or a flat amount. Set the Issue Date and Due Date, and save.
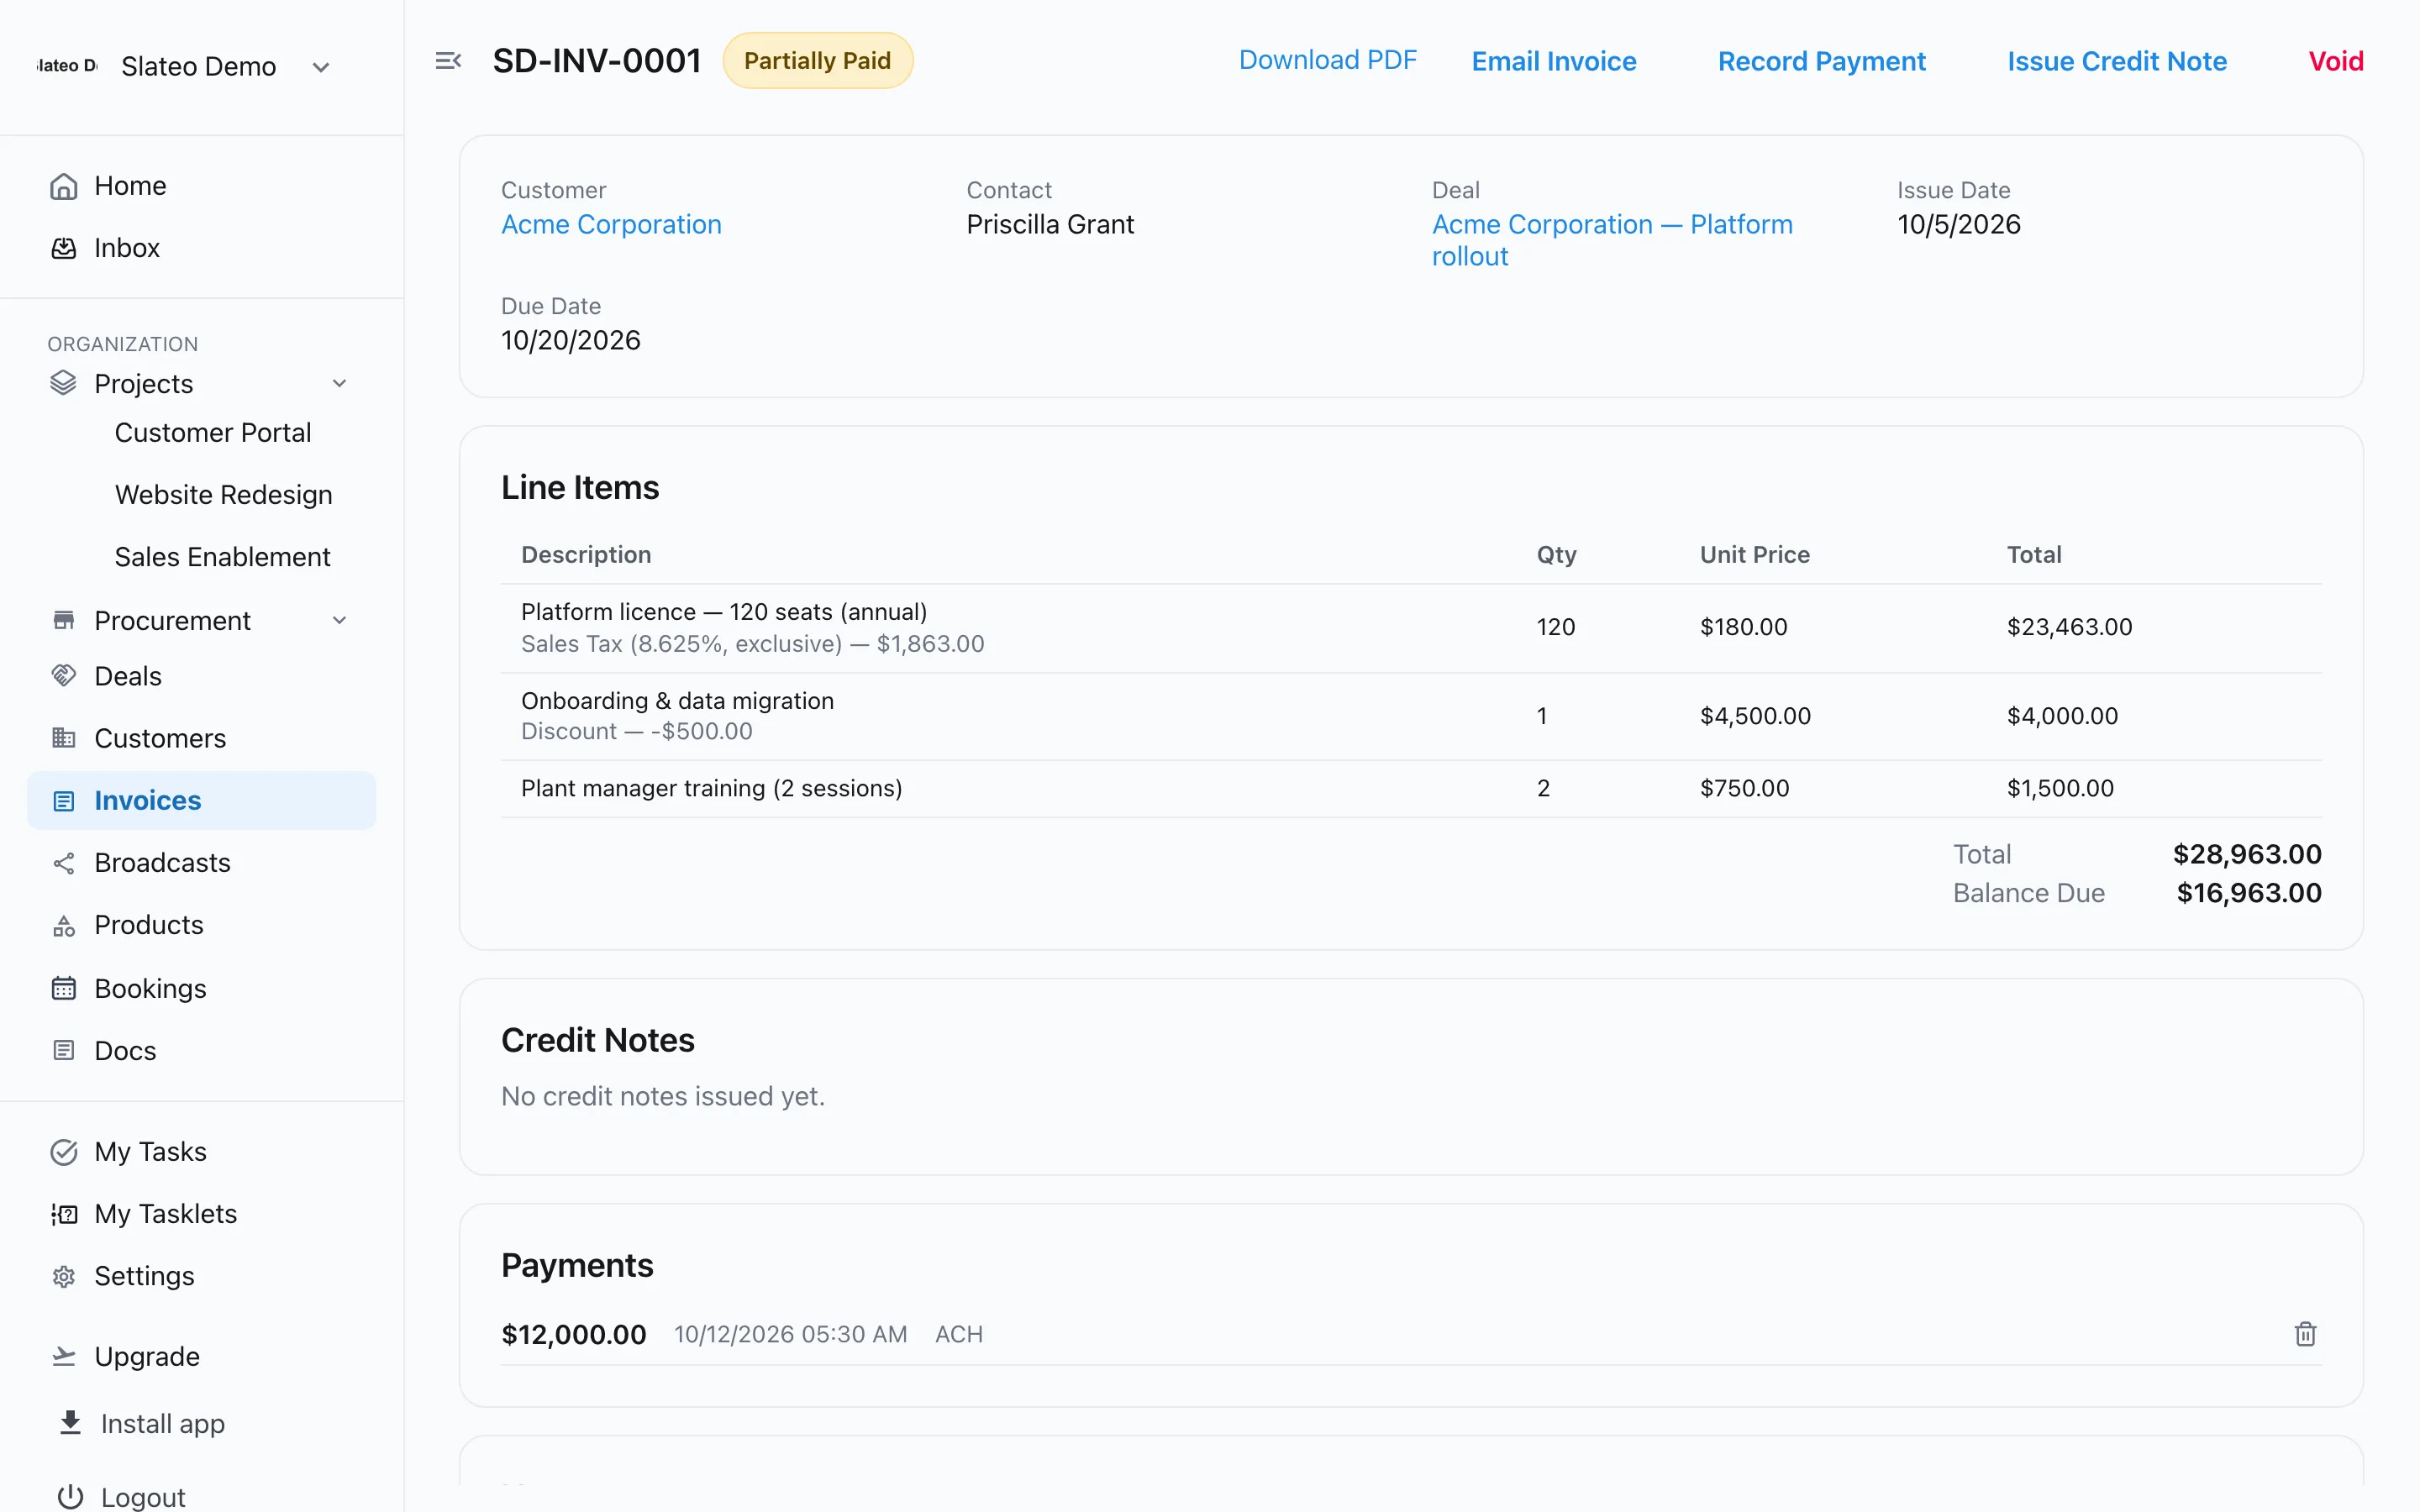
An invoice with tax, a discount and a payment. Step 4: Send it
On the invoice, choose Email Invoice to send it with the PDF attached, or Download PDF to send it yourself and then Mark as Sent.
Step 5: Record payments
When the customer pays, choose Record Payment and enter the Amount, Date, Method and a Note. The balance and status update: partially paid, then paid. Filter the list by status, or Overdue only, to see what's outstanding.
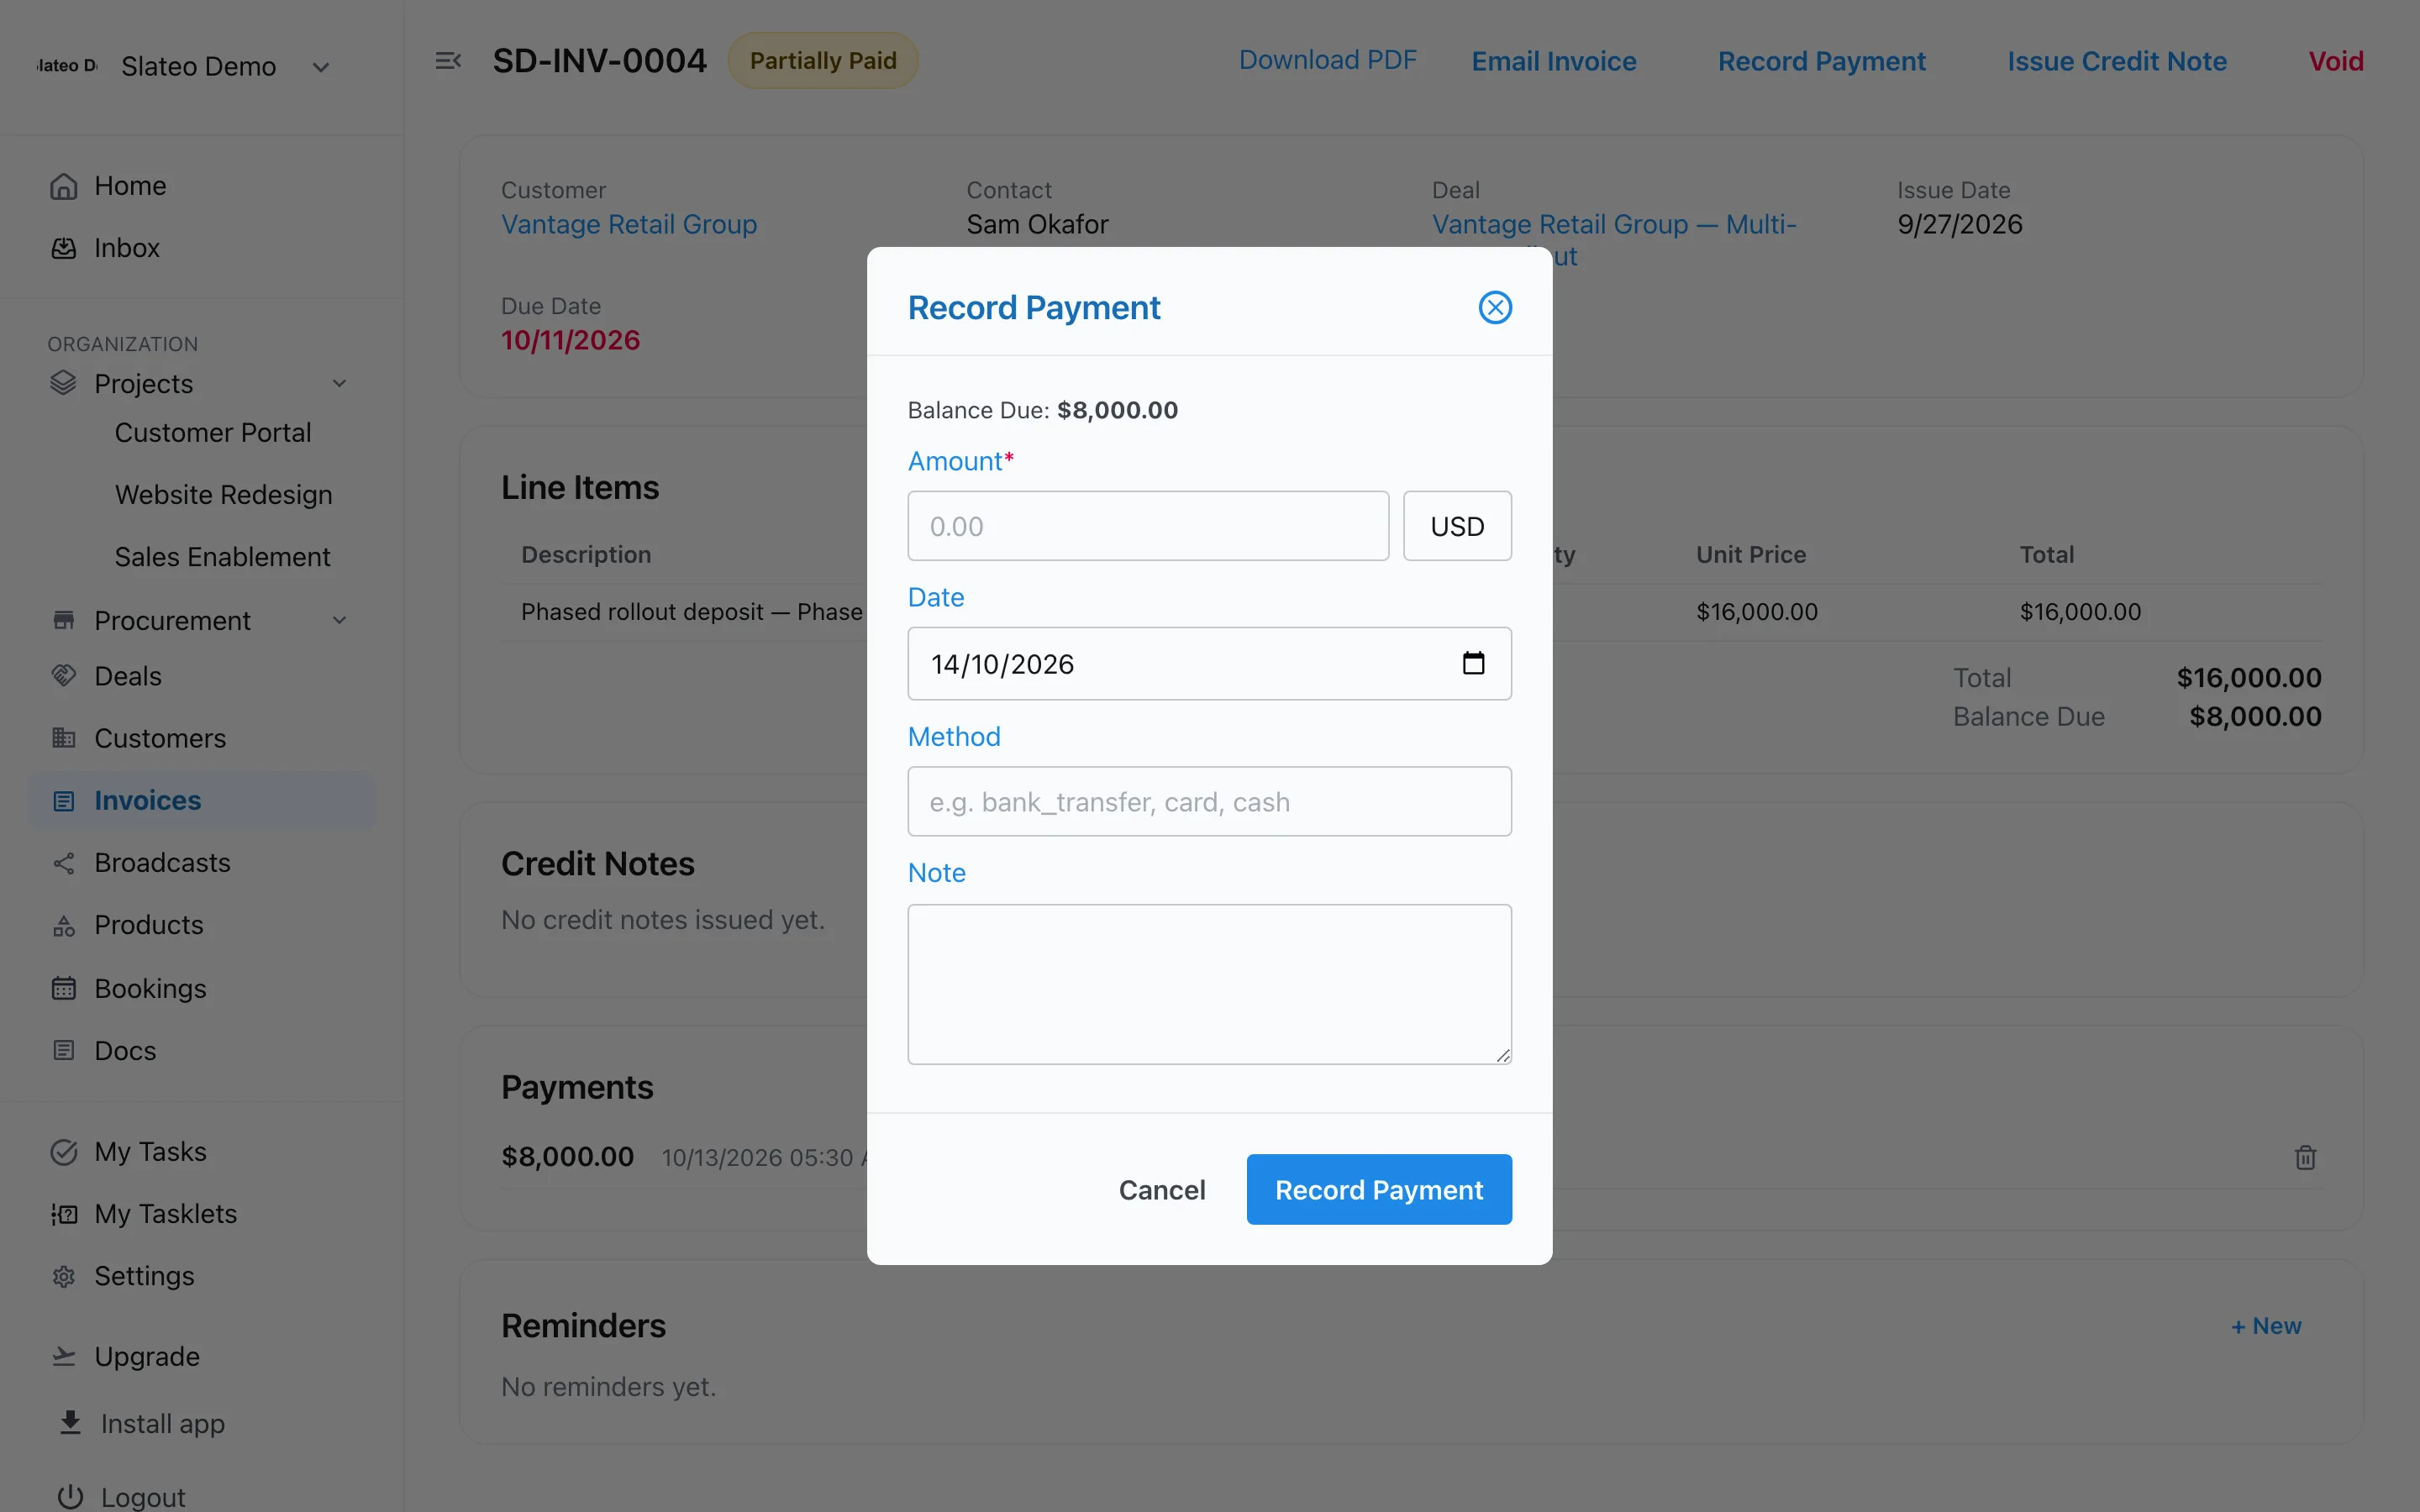
Recording a payment. Step 6: Fix a mistake
Choose Issue Credit Note to credit part or all of an invoice, with a reason. A credit note can later be refunded or voided. To cancel an invoice that should never have gone out, choose Void.
Was this guide helpful?